
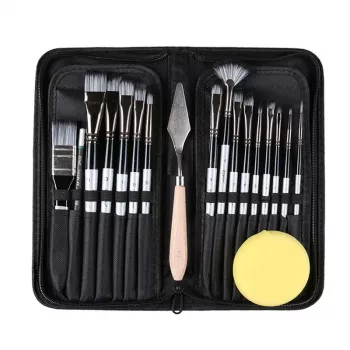
Multifunctional nail art brushes make it easier to move from outlining to filling, shading, and adding fine details without constantly swapping tools. The payoff is cleaner edges, smoother transitions, and less wasted product—especially when you learn a simple routine for loading the bristles, controlling pressure, and cleaning as you go. Whether you’re doing quick DIY sets or practicing more intricate designs, the right brush shapes can help you get consistent results with a lot less mess. For more guidance, see [PDF] Laboratory Study of Chemicals in Nail Products.
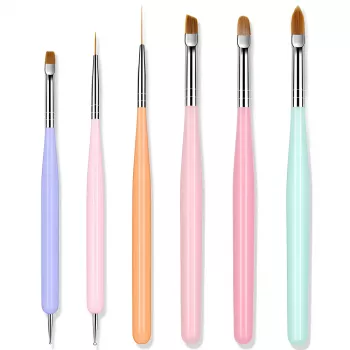
A “multifunctional” set isn’t one magic brush that does everything perfectly; it’s a compact lineup of shapes that covers most common techniques. One kit can handle outlining, striping, gradients, and small accents because each brush type solves a different problem—sharp lines, tight corners, smooth coverage, or controlled curves. For further reading, see The effect of nail sticker use on hand surface bacterial counts after ….
Bristle length and density matter as much as the shape. Longer bristles hold more product and glide farther, which is ideal for striping, while shorter bristles resist bending and keep detail crisp. Softer bristles can help gel level smoothly; firmer bristles give you more control for pushing product into clean edges.
A practical “do-it-all” mix usually includes: a liner (long and thin), a detailer (short and fine), a flat or square brush for filling and smoothing, and an angled or oval brush for curves and sidewalls.
Each brush type shines when you match it to the right motion and the right amount of product:
| Brush type | Best for | Quick tip | Common mistake |
|---|---|---|---|
| Liner / Striper | Long lines, French tips, geometric outlines | Load only the first third of bristles and rotate slightly to keep a sharp point | Pressing too hard, causing wavy lines |
| Detailer | Tiny accents, crisp corners, micro-florals | Use minimal product; “touch and lift” for clean endpoints | Overloading the brush so details blob |
| Flat / Square | Color blocks, smoothing gel, placing glitter | Use the edge to carve a straight boundary | Dragging with a dry brush, leaving streaks |
| Angled | Sidewalls, curved strokes, one-stroke petals | Angle the brush so only the tip contacts the nail | Using the full face of the brush and flooding cuticles |
Brush control gets dramatically easier when the product behaves the way your technique needs it to:
For general product and ingredient safety basics, the FDA’s nail care product guidance is a helpful reference point, especially if you’re sensitive to certain solvents or resins.
If you work with strong solvents or do nail art frequently, basic ventilation and exposure awareness also help—see the CDC/NIOSH guidance for beauty salon safety.
A small multifunctional brush set covers most everyday designs without specialty tools—perfect for line drills, curve control, and quick gradients that build consistency fast. For an easy starter add-on, Multifunctional Nail Art Brushes are in stock and priced at $3.01 USD.
For steadier hands during detailed work sessions (especially if you tend to tense up while concentrating), pairing your practice with a simple focus routine can help. If you like structured checklists, Calm at Work: Smart Strategies to Manage Stress and Boost Focus | Digital Guide for Professionals | How to Manage Stress at Work eBook & Checklist is also in stock.
Nail art brushes are scaled for tiny surfaces, with finer points and bristle firmness designed for polish and gel control. They’re also used with products that need quick cleanup and precise edge work, so shape retention and easy wiping matter more than with most craft brushes.
Yes, as long as you clean immediately and thoroughly between products. If possible, keep separate brushes to avoid contamination, and always keep gel-loaded brushes away from UV/LED light so they don’t cure in the bristles.
Clean promptly, reshape the tip after washing, and avoid long acetone soaks that can weaken bristles and loosen the ferrule. Store brushes capped or in a closed case, and use light pressure for line work so bristles don’t splay.
Leave a comment